Basic Setup for Your Ring Spotlight Cam Battery/Solar Camera
Authored by: Support.com Tech Pro Team
1. Introduction: Ring Camera: Spotlight Cam Battery Basic Setup
2. Ring Camera: Charge Battery
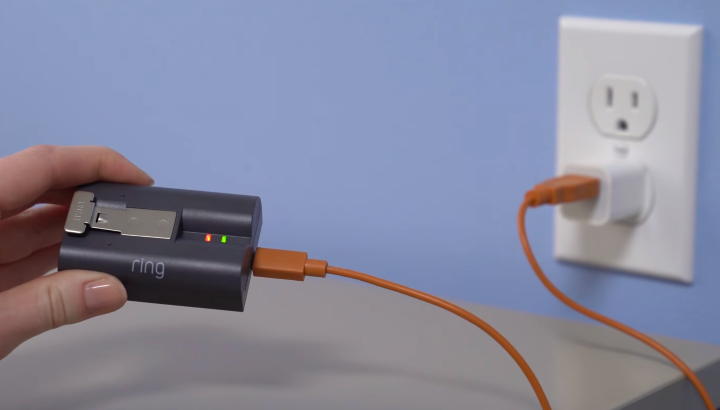
Plug one end of the charging cable into the battery and the other end into a power outlet. While charging, both the red and green lights will stay on. When the battery is completely charged, only the green light will remain on.
3. Ring Camera: Insert Battery
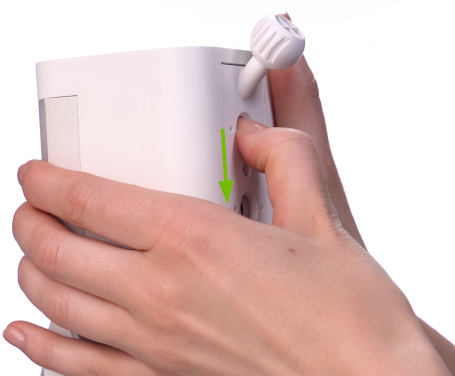
Press the button on the back side of the battery compartment door and open the door downwards.
Slide the battery in until you hear a click.
Firmly close the battery compartment door until you hear a click.
4. Mobile: Android or iOS
For the next steps, we need to determine what type of mobile device you have.
5. Ring: Install Android App
Launch the Play Store on your smartphone.
Search for "Ring" using the search box located at the top.
Touch the magnifying glass on the on-screen keyboard to search.
On the Ring App install page, tap INSTALL.
Review the install prompt that pops up. Once done, touch ACCEPT.
Wait for the download to finish. Once done, touch OPEN.
6. Ring App: Add Device
From your device's main screen, open the Ring app.
Select Set up a Ring device.
You will be prompted to sign up for a Ring account, or log in to an existing account.
Once logged in, you will be presented with a list of Ring devices. Select the device you'll be adding.
Once you have selected your device, you will be prompted to name that device.
The Ring app will attempt to apply a geographic location to your device based on your Ring account's information and mobile device's GPS. Select Continue to proceed.
The app will instruct you on what to do with your Ring device to continue setup. Select Continue to proceed.
The app will now ask that you exit it briefly to connect your mobile device to the Wi-Fi network your Ring device is broadcasting. The app will display a helpful video that will instruct you on how to complete this on your mobile device.
Once you're connected to the Ring's Wi-Fi network, the Ring app will recognize this and alert you. Tap the alert to be brought back into the Ring app to continue the setup process.
The Ring app will then begin searching for Wi-Fi networks around you.
Select your Wi-Fi network from the list of available networks.
When prompted, type in your Wi-Fi network's password (if necessary), and select Continue.
Your Ring device will begin connecting to your Wi-Fi network.
Congratulations! Your Ring camera is now setup and ready to use. Select Continue to complete setup.
7. Ring App: Test Camera
While still near your router, bring up the Ring app on your mobile device.
Select the camera you want to test.
Then tap on Live View.
If the video quality is good you can proceed where you want to install the camera.
Go to where your camera will be installed.
If you have a wired camera, make sure it's powered up.
Again, access the Live View on your mobile device.
Make sure the video quality is good and proceed with mounting the camera.
If the video feed is not as good as you want, you can try moving your router closer to the camera's installation location, or purchase a Ring Chime Pro to extend your network further.
8. Ring Camera: Proper Positioning
The camera needs to be mounted 9 feet off the ground, with the motion detector parallel to the ground for an optimal position to detect human-sized objects at up to 30 feet.
9. Ring Camera: Mounting Plate Direction
The camera can be mounted on a wall or an eave by changing the direction of the mounting plate:
To mount it on a wall, the ball socket needs to be pointing downward
To mount it on an eave, the ball socket needs to be pointing upward
To change the direction in which the ball socket is pointing, do the following:
Press the button on the back side of the battery compartment door and open the door downwards. Remove the security screw and the weather seal.
Press the release button and slide the mounting plate out.
Rotate the mounting plate upside down then slide it back in.
Firmly close the battery compartment door until you hear a click. Insert the weather seal and tighten the security screw to lock the mounting plate in place.
10. Ring: Mount Spotlight Cam Battery
Use the mounting bracket to mark the holes on the surface where you want to install the camera.
If installing on a masonry surface, first drill holes using the provided drill bit. Insert the wall anchors before installing the screws.
If installing on a wood surface, use the install screws to screw the mounting bracket directly into your wall or eave.
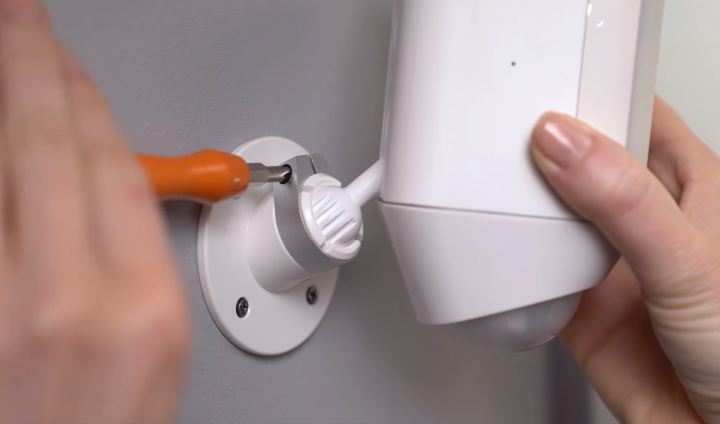
Pop the camera into the socket.
Adjust the camera angle and tighten the side screw on the left to secure the camera position.
Check the camera live view on your mobile device to make sure the angle is right.
11. Ring: Mount Solar Panel
Select an install location where the solar panel can get at least one hour of direct sunlight a day.
Use the mounting base to mark the holes on the surface where you want to install the camera.
If installing on a masonry surface, first drill holes using the provided drill bit. Insert the wall anchors before installing the screws.
If installing on a wood surface, use the install screws to screw the mounting base directly into the surface.
Slide the solar panel onto the arm.
Remove the weather seal from the back of the camera.
Plug the charging cable coming from the solar panel into the power connector on the back of the camera. Line up the screw holes, then secure the plug with the included screws.
.png)