How to account for transaction fees in Wave Financial
Authored by: Support.com Tech Pro Team
1. Introduction
How to account for transaction fees in Wave Financial
2. Resolution
Head over to Accounting > Transactions and locate the net deposit.
If you create transactions manually in Wave, you'll first need to click Add Expense on the Accounting > Transactions page. Then, select the relevant Account, enter a Description, and enter the net deposit amount
Click into the transaction detail view by selecting the drop-down arrow under Actions (Transaction options), and clicking Edit more details.
Select the Split transaction.
Split the transaction into 2 parts; $100 and -$3. (Notice the negative next to the $3 amount. This is to ensure that the total equals $97.)
To make the $3 fee negative in Wave, select Discounts and Fees from the category dropdown, and select the appropriate account. The transaction will automatically be marked as negative.
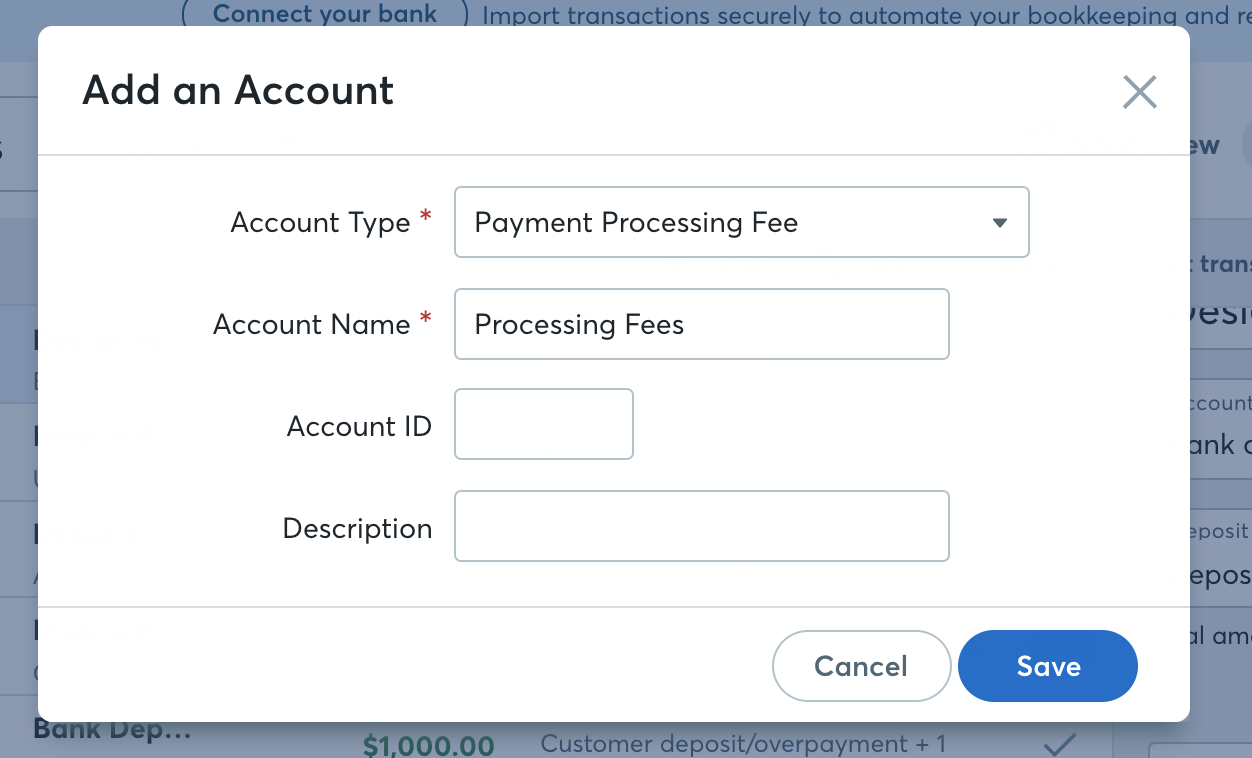
If you don't see a processing fee account under Discounts and Fees, you can create this now from your Transactions page, by clicking Add a new category at the bottom of the Category dropdown menu:
In the Account Type dropdown, select Payment Processing Fee, under Expense.
In the Account Name section, name it something like Processing Fees.
Optionally, enter an Account ID and Description.
Click Save.
This account will appear under Payment Processing Fee on your Chart of Accounts Expenses page, and under Discounts and Fees on your Transactions page.
Select the $100 portion of the transaction, and under Category, select Payment Received for an Invoice in Wave > Invoice #. This will apply the payment to the relevant invoice, if applicable.
If you do not have an invoice for this customer, categorize the $100 to the appropriate income account for your business.
Click Save. Your transaction should now appear as below:
.png)