How to Audit Organizational Units (OUs) Changes in Active Directory
Authored by: Support.com Tech Pro Team
1. Introduction
How to Audit Organizational Units (OUs) Changes in Active Directory
2. Step 1: Enable Auditing of Organizational Unit Changes
Do the following to enable the auditing of Organizational Unit changes
Open Group Policy Management Console.
In the left navigation pane, go to the domain, and select a customized Group Policy Object in the “Domain Controllers†node.
We recommend you to make such changes only in the customized GPOs and not in the default policies
You can also create a new policy by right-clicking and selecting the “Create a GPO in this domain and Link it here…†option in the context menu.
Right-click the already existing or new GPO, and select the “Edit†option from the context menu. It opens Group Policy Management Editor.
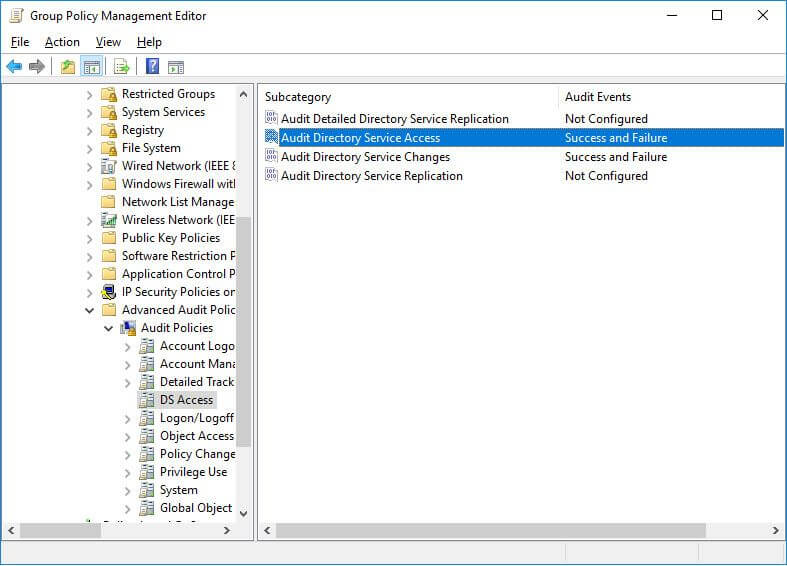
In the left navigation pane, expand the nodes to navigate through “Computer Configuration†➔ “Policies†➔ “Windows Settings†➔ “Security Settings†➔ “Advanced audit policy configuration†➔ “Audit Policiesâ€.
Click the “DS Access†node to list all of its policies in the right panel.
Double-click the “Audit Directory Service access†policy to access its properties.
Configure it for both “Success†and “Failure†audit events.
Similarly, enable “Audit Directory Service Changes†by configuring it for both “Success†and “Failure†audit events.
Close the “Group Policy Management Editor†window. It takes you back to the “Group Policy Management Consoleâ€.
Select the GPO under the “Domain Controllers†group, which you have just modified in the previous steps.
In the “Security Filtering†section of the right pane, click “Add†to apply this GPO to all Active Directory objects. It shows the “Select User, Computer, or Group†window.
Type “Everyone†to apply this GPO to all objects.
Click “Check Names†to validate the entry and click “OK†to add it.
It takes you back to the “Group Policy Management Consoleâ€. Now close this window.
After applying the GPO to all objects, you have to update the Group Policies in the entire forest. To do it, execute the following command either in the “Run†dialog box or at Command Prompt. Please start any of these utilities with administrative privileges.gpudpate /force
3. Step 2: Enable Auditing in ADSI Edit
After enabling the auditing of Active Directory for auditing, let’s select what we want to audit:
Go to Start Menu or “Control Panel†and access “Administrative Toolsâ€.
Open “ADSI Edit†window.
Right-click “ADSI Edit†node in the left navigation pane and click “Connect To†option.
In “Connection Settings†window, select “Default naming context†In “Select a well known Naming Context†drop-down menu.
Click “OK†to connect to “Default Naming Contextâ€. It takes you back to “ADSI Edit†window.
Double-click the root node “Default Naming Context†to expand and access its sub-nodes.
Right-click the top node titled “DC=www,DC=domain,DC=com†and click “Propertiesâ€.
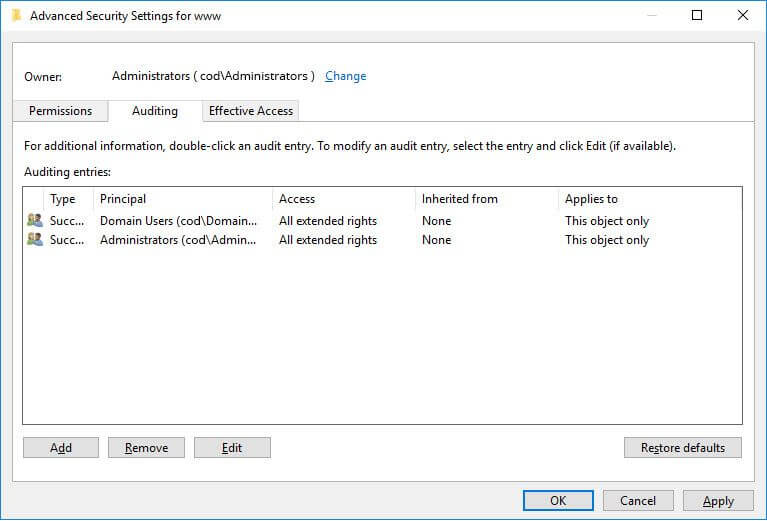
In “Propertiesâ€, switch to “Security†tab and click “Advanced†button to access “Advanced Security Settings for wwwâ€.
Switch to “Auditing†tab.
Click “Add†to add a new auditing entry. It shows “Auditing entry for www†on the screen.
Click “Select a Principal†link. It shows “Select User, Computer, Service Account or Group†window.
Type “Everyone†in the text box to audit the changes made by all Active Directory objects in the Organizational Units. You can enter the name of user or group to audit changes made by them only.
Click “Check Names†to verify the entry and Click “OK†to add it.
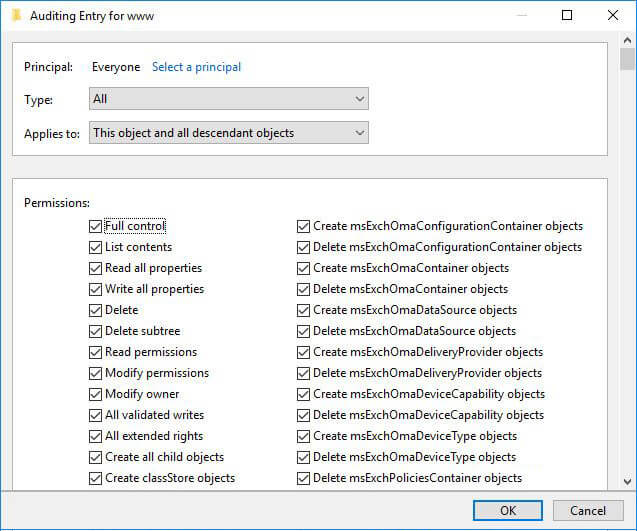
Click “OKâ€. It takes you back to “Auditing Entry for www†window, which now shows “Everyoneâ€.
Enter “All†“Type†box to audit both successful and failed events.
Select “This object and all descendent objects†in the “Applies to†field. It enables the auditing on the descendant objects of Organizational Units also.
Select “Full Control†in the “Permissions†to audit everything.
Click “Apply†and “OKâ€.
Close the console
4. Step 3: Viewing events
After configuring auditing, open Event Viewer. Search security log for the following event IDs.
Event ID 5136: A directory service object (Organizational Unit) was modified.
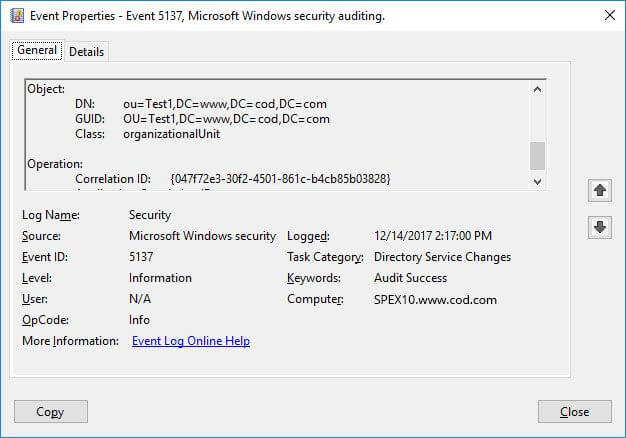
Event ID 5137: A directory service object (Organizational Unit) was created.
Event ID 5139: A directory service object (Organizational Unit) was moved.
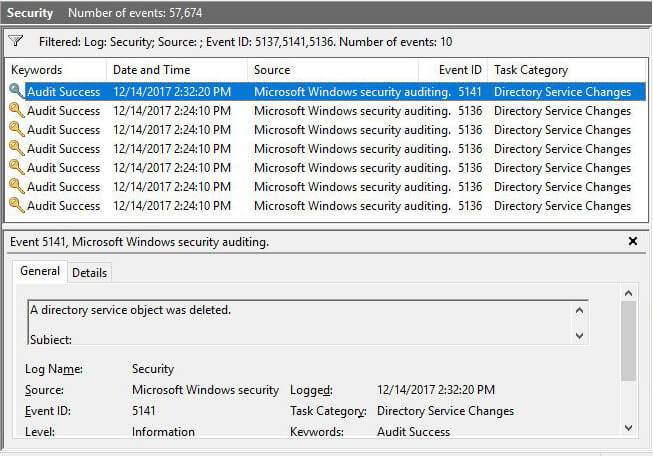
Event ID 5141: A directory service object (Organizational Unit) was deleted.
In these events’ types, you can see who created, modified, deleted, or changed permissions of a GPO. The following screenshot shows an OU creation event (5137). You can get information like Username, Event time, and new OU’s name in this window.
You can scroll down in the event to view the name of the created organizational unit.
The following screenshot displays the log of multiple events like 5141 for deleted organizational unit and 5136 for modified organizational units.
.png)