How to Fix Jumbled and Distorted Picture in Windows
Authored by: Support.com Tech Pro Team
1. Introduction
You may be getting a distorted picture on your computer screen similar to the one above. This can happen due to a bad connection between your computer and its display, due to corrupted software or drivers, or even due to faulty hardware. This guide will take you through some troubleshooting steps you can take on your own to attempt to resolve this type of issue.
Tools You'll Need:
A paperclip
iPhone charging cable
Access to a computer with iTunes installed
Any other non-consumable tools needed
Comment out tools section if no tools are necessary
-->
Supplies You'll Need:
Zip ties
Any other consumable supplies
Comment out supplies section if no supplies are necessary
-->
Before You Begin:
You must have access to a computer with iTunes installed.
You must have that thing for the other thing so you can do the thing.
Each individual prereq should have its own box like this. Not all will contain multiple links.
Comment out prerequisites section if no prereqs are necessary
-->
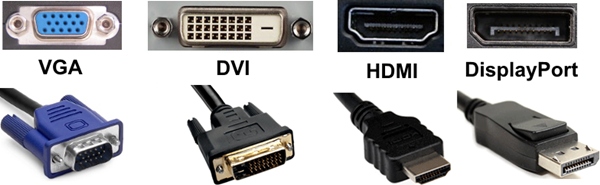
2. Check the Video Connection Between the Monitor and Computer
For a desktop computer with a separate monitor
Monitors can be connected to a computer through a variety of video connection types. The most common ones are shown below:
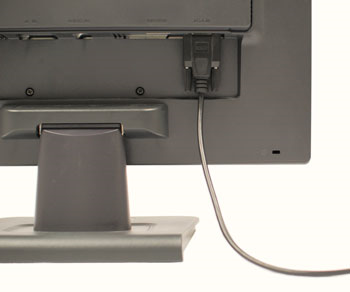
Check one end of the video cable and make sure it is firmly plugged into the monitor.
Check the other end of the video cable and make sure it is firmly connected into the rear panel of the computer.
If your computer and monitor support more than one type of video connection, connect the two with another type of cable.
You can also try connecting the monitor to another computer to find out if the monitor malfunctioning, or connect another monitor to the computer to find out if the computer is malfunctioning.
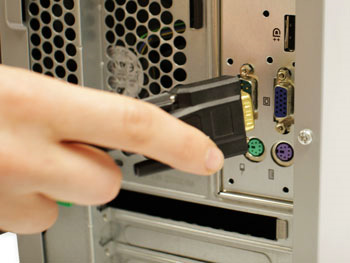
For a laptop or all-in-one computer
These types of computers have a built-in display but they may also have a video port which allows you to connect an external monitor to them.
Check for any of the following connection ports on the computer and check if you have a monitor with a matching port.
Plug in one end of the video cable into the monitor and the other into the computer.
Connect the monitor to a power outlet, turn it on and set the video input source to match the connection port.
3. Adjust Screen Resolution in Windows 10
Make sure your monitor is being seen. You can check and make sure the resolution is correct as well. Improper resolution can have negative affects on your display.
If an improper setting has been checked, resetting it this way can help bring the display back in line.
Open the Start menu and select Settings.
Select System.
In Display, check the Scale and Resolution options, and adjust these options to make your screen look proper. Setting to an option labeled (Recommended) is often the best choice.
If you make a change to the resolution, you'll be asked to make sure you can still see what is on the screen. If it looks proper, select Keep changes, otherwise, select Revert, or wait 15 seconds for it to revert automatically.
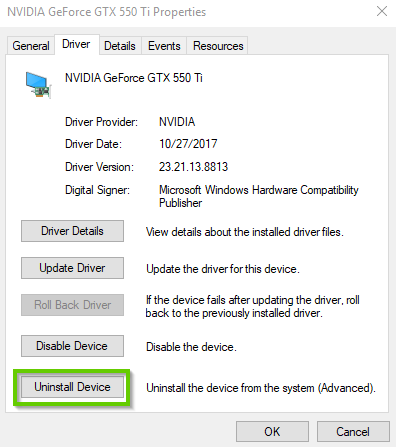
4. Uninstall My Computer's Video Driver
Uninstalling your video driver may help correct any corruption or errors that may have been causing your issues
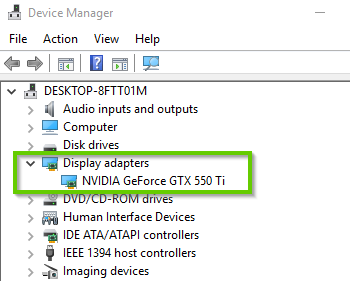
Click Start, search for and then select "Device Manager".
Select the small arrow next to Display adapters to expand this section, and see the devices in them.
Double click one of the devices under one of these headings to show its properties. Select Driver.
Select Uninstall Driver.
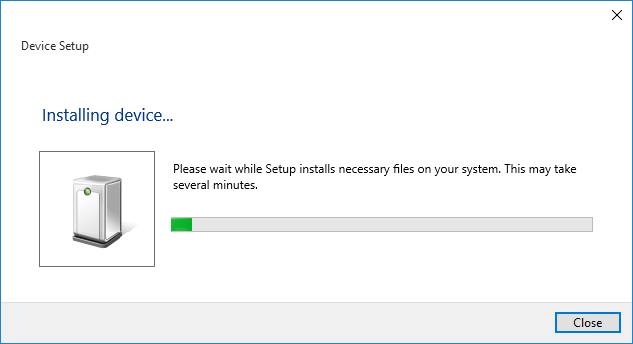
5. Re-Install the Video Driver
Windows will automatically recognize the missing device drivers and set them up for you.
If Windows is unable to install the correct drivers, they will need to be installed manually. The drivers may come with the peripheral on a disc or you can download them from the manufacturers website.
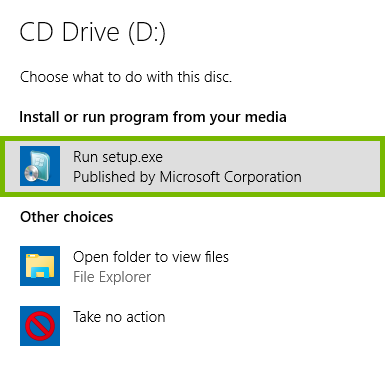
Install Drivers from Manufacturer CD or DVD
Insert the disc that came with your device into the computer.
You may get a pop-up on the screen asking you what you want to do with the contents of the disc. Choose the option that allows you to install or run the software from the disc.
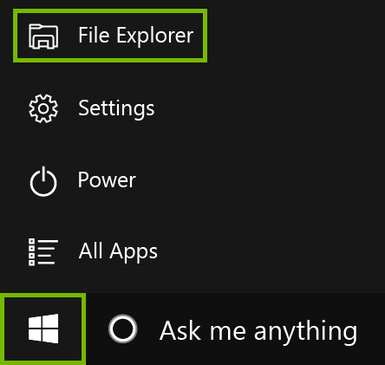
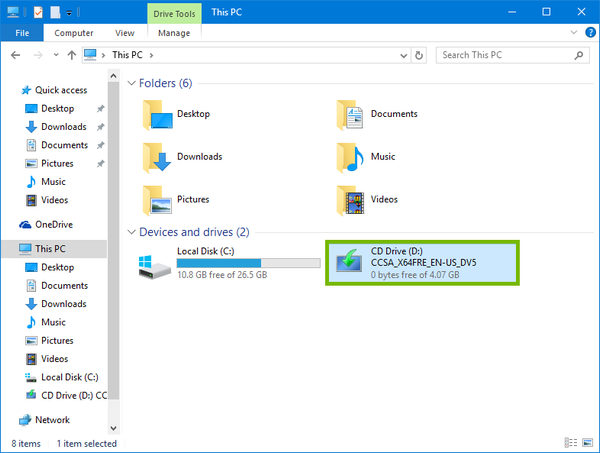
If you don't get this pop-up, click on the Windows button on the bottom left corner of the screen, then click on File Explorer or its icon.
In the File Explorer, look for the disc drive and double click it to open its contents.
Look for the Setup or Install file and launch it, then follow the instructions to install the drivers onto the computer.
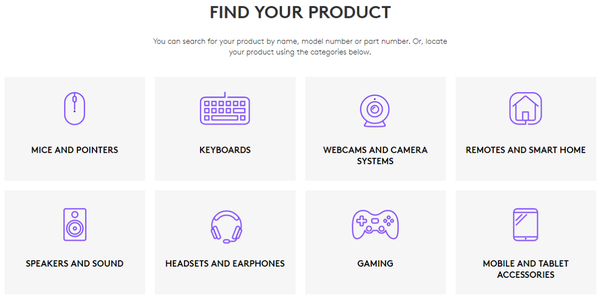
Download Drivers from the Web
Open a web browser on your computer.
Navigate to the manufacturers website.
Look for the Support heading on the website and click on it.
The place where the drivers can be downloaded from varies by how the manufacturers website is designed. Sometimes you can find them under the Downloads section, other times under Software or under Drivers, or even a combination of these words.
You can either find the needed drivers by typing in the peripherals name and model in the search field like in the image above or you can find them by clicking through the categories of devices like in the image below.
Once you've located the driver for your device, click to download it and save it onto your computer.
Launch the downloaded driver and follow the instructions to install it on the computer.
6. If It Still Doesn't Work
Remove Hidden Spyware In Minutes For Free
Detect and remove spyware, keyloggers, tracking cookies, and other
threats that slow down your PC or steal your data.
65+ Million Downloads
Spyware scanner with AI-powered detection engine + database
.png)