How To Fix No Service & No Signal Message on Android

Authored by: Support.com Tech Pro Team

1. Introduction

If your Android device displays a "No Service" or "Searching" message, or can't connect to your cellular network or cellular data, the following steps may help resolve these issues for you.

Tools You'll Need:

  • A paperclip
  • iPhone charging cable
  • Access to a computer with iTunes installed
  • Any other non-consumable tools needed
  • Comment out tools section if no tools are necessary

-->

Supplies You'll Need:

  • Zip ties
  • Any other consumable supplies
  • Comment out supplies section if no supplies are necessary

-->

Before You Begin:

  • You must have access to a computer with iTunes installed.
  • You must have that thing for the other thing so you can do the thing.

You must have this thing before you whatever.

-->

Android

2. Enable Cellular Data

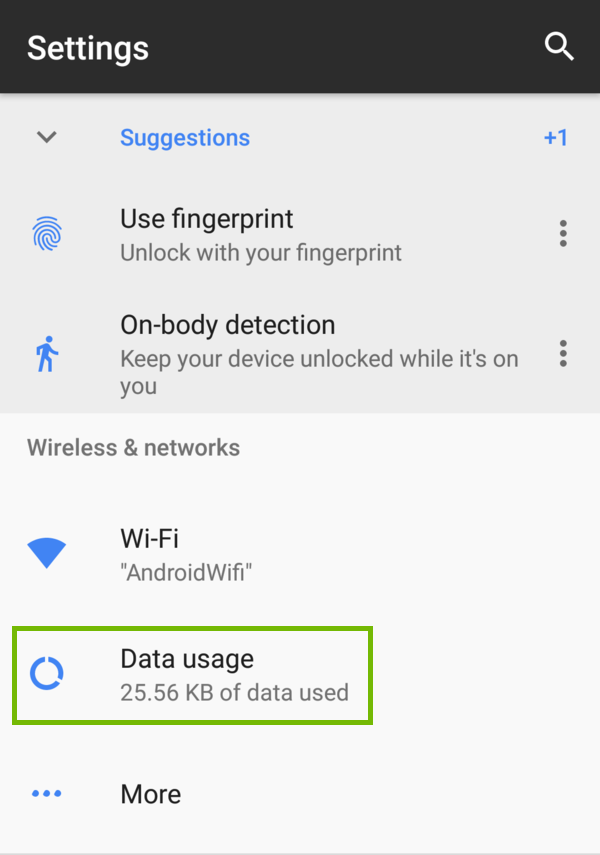
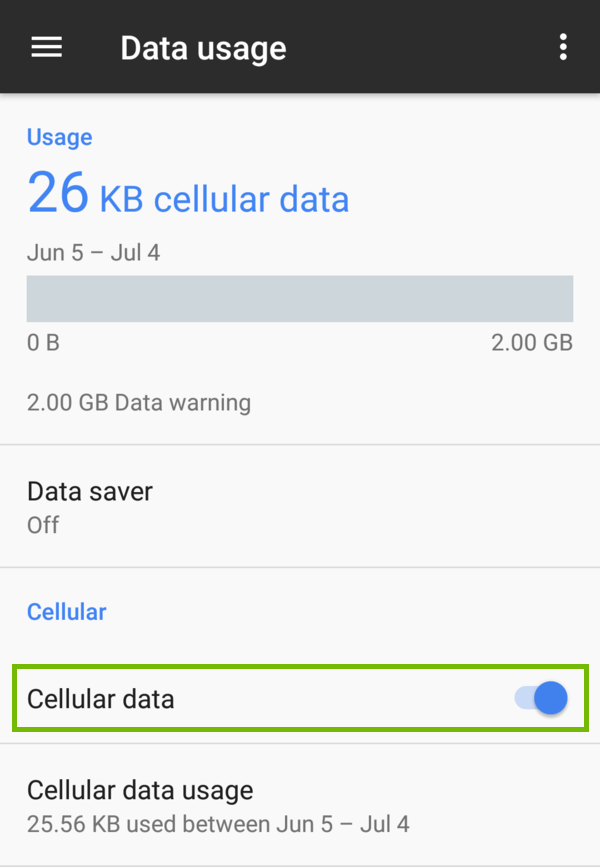
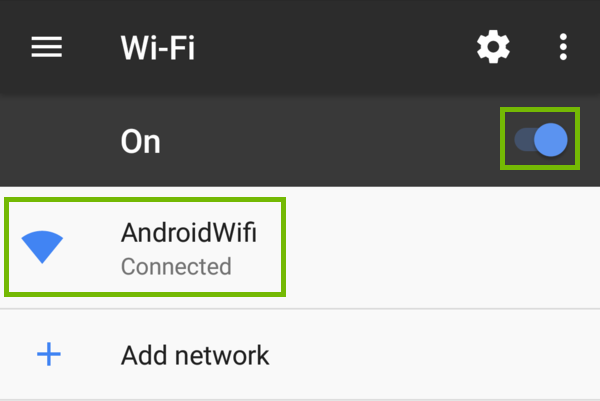
Enabling Cellular Data allows your Android Smartphone to tap into the data you pay your provider for. If this is turned off you may not get a connection to your provider at all.

Make sure that you're in an area with cellular network coverage. If you're not within range of your network you may not be able to access your cellular data or you may be charged roaming fees. Check with your cellular provider to determine if you are in an area covered by your cell provider.

Domestic Cellular Data

  1. Open Settings on your phone or tablet.
Android Settings.
  1. Select Data usage.
Settings with Data usage highlighted.
  1. Make sure Cellular data is turned On.
Data usage with Cellular data turned on.

Roaming Cellular Data

If you are out of the country, your cellular provider most likely charges much, much higher rates. Please check with your cellular provider to determine what prices to expect, before you travel.

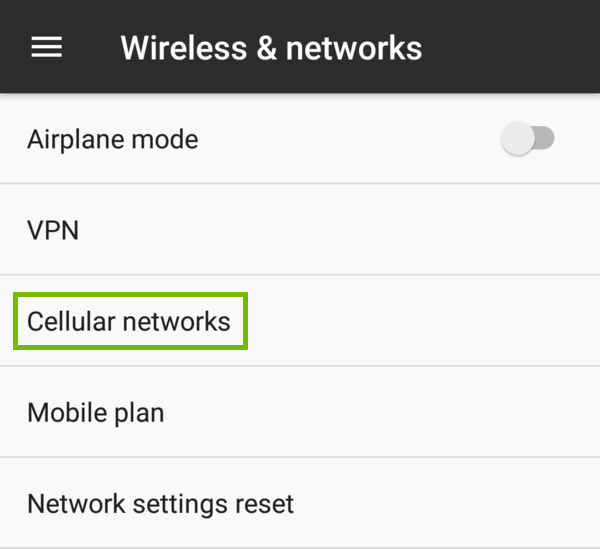
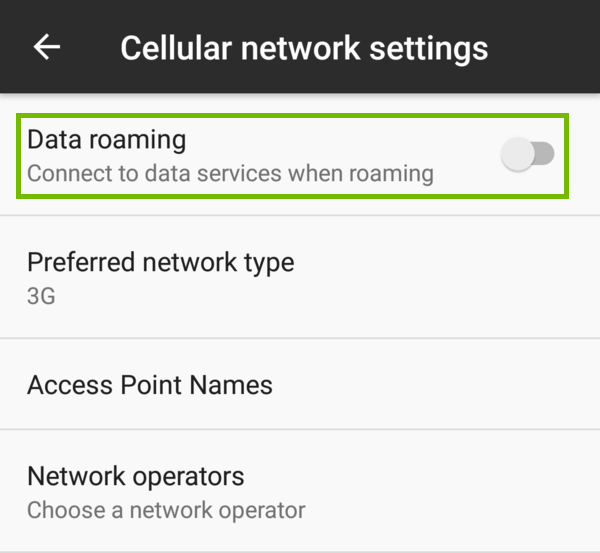
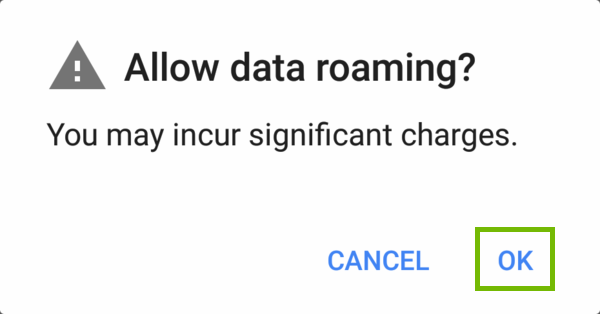
By default, your Android device disables roaming data, to prevent you from getting really large bills for your data use. If you wish to enable data while roaming, continue below.

  1. Open Settings on your phone or tablet.
Android Settings.
  1. Under Wireless & networks, select More.
Settings with More highlighted.
  1. Select Cellular networks.
More wireless and network settings with Cellular networks highlighted.
  1. Set Data roaming to On.
Wireless and networks with Data roaming highlighted.
  1. Decide to enable roaming or not.
    As a final reminder, turning this feature on may incur significant charges on your cellular bill. Select OK to proceed.
Allow data roaming dialog with OK highlighted.

3. Check Wi-Fi

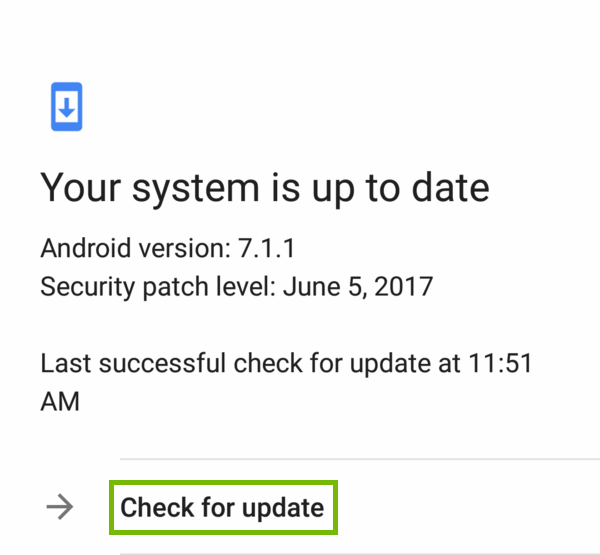
Depending on what device (Smartphone or Tablet) and which generation you have, the menu theme and options might look slightly different on your screen. However, the steps should be similar across all Android devices and generations.

To Check If Your Android Mobile Device Is Connected to Wi-Fi

  1. Open Settings on your phone or tablet.
Android Settings.
  1. Select Wi-Fi.
Wi-Fi
  1. Make sure Wi-Fi is turned On. The Wi-Fi network that you are connected to will say Connected under its name.
Wi-Fi settings with Wi-Fi On switch and connected network highlighted.

4. System Update

  1. Open Settings on your phone or tablet.
Android Settings.
  1. Scroll to the bottom, and select About.
Settings with About phone highlighted.
  1. Select System update.
Status with System update highlighted.
  1. You'll see if there's any updates available, as well as when your device last checked for updates. If you wish, you can choose Check for update to make sure.
Updates with Check for update highlighted.
  1. If an update is available, you can download and install it here.Do not turn off your phone during an update, it can result in serious problems that would require a qualified technician to fix.

5. Restart

  1. Hold down the power button on your Android device.
    Depending on the manufacturer and model of Android device you have, the location of the power button will vary.
  2. A prompt will appear on-screen. Select Restart.
Power prompt with Restart highlighted.

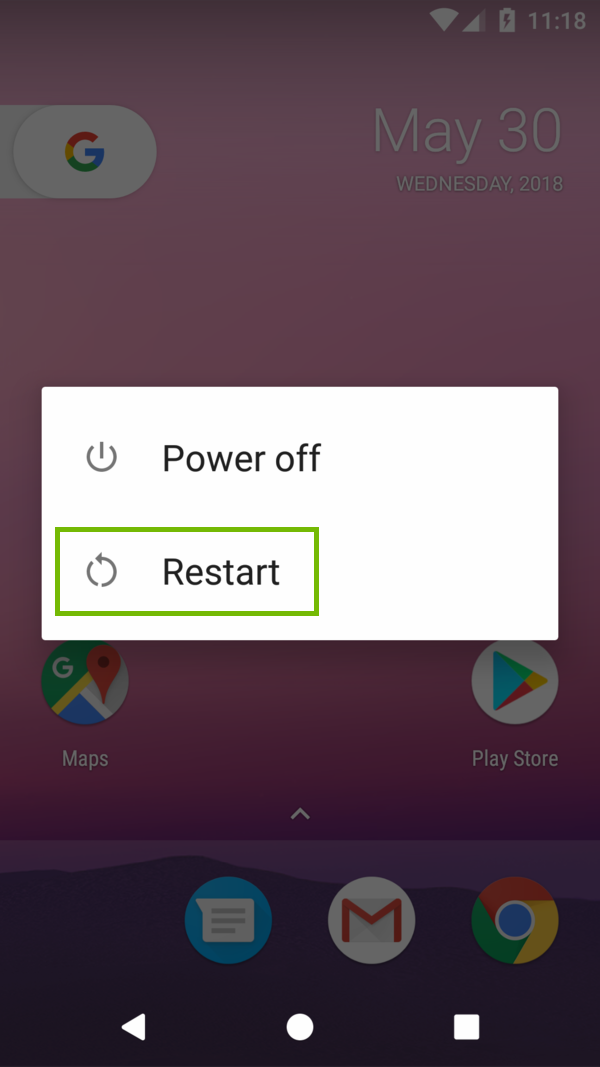
If the menu does not pop up, continue to hold the power button, and your Android device will shut off.

  • If you had to shut down your Android device, wait 30 seconds before turning your device back on.

6. Reseat SIM Card

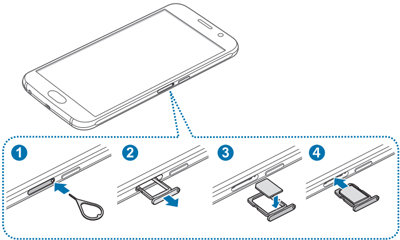
The next step is to re-seat the SIM card your phone uses to get information on how to access your cell provider's network.

If you are not comfortable reseating your sim card, or do not have the SIM eject tool skip the step and answer as such at the bottom.

  1. Eject and re-seat the SIM Card.
Ejecting and seating a SIM card.

  1. Use the SIM eject tool to eject the tray.
  2. Carefully pull the tray out.
  3. Re-seat the SIM, making sure the notch lines up properly with the spot for it.
  4. Push the SIM tray back in till it's flush with the edge of your phone.
  5. Press and hold the power button untill your phone turns back on.

7. What's next?