.png)
Authored by: Support.com Tech Pro Team

This will help the You to set automatic replies on a user's mailbox in Office 365
This Guide has three methods that you can use to set automatic "out of office" replies on a user's mailbox in Microsoft Office 365 on the customer's pc
1. Sign in to the Office 365 portal.

2. Locate Users > Active users (or Groups > Shared mailboxes if you set this on a shared mailbox).

3. Select a user who has a Microsoft Exchange mailbox.

4. On the flyout menu on the right, locate Mail settings > Automatic replies (if it's a shared mailbox, just locate Automatic replies on the flyout)
1. Sign in to the Office 365 admin portal by using administrator credentials.

2. Expand Admin Centers, and then select Exchange.
3. Click the picture in the upper-right corner, select Another User, and select the user mailbox you want to change.
4. On the left side, select Options, click Organize E-mail, and then click Automatic replies
Run the following cmdlet in Exchange Online PowerShell:
Set-MailboxAutoReplyConfiguration


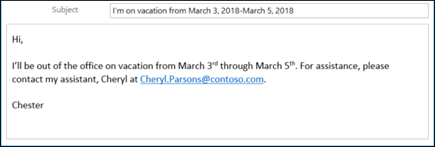
When you click File in Outlook, you should see a screen that looks something like this:

If you see a button that says Automatic Replies, see Send automatic out-of-office replies from Outlook. Otherwise, use the following steps to create a template to reply to messages and set up Outlook to reply to every message you receive.
Create an out-of-office template
You can create a new template every time you're out of the office or reuse an existing template. Now you're ready to use that template to create your Out of Office rule.
Create an out-of-office rule

To have the rule send automatic replies to your email messages while you're gone, you must leave Outlook running

Support.com is committed to your privacy
We do not share or sell your data to third parties. We do use cookies and other third-party technologies to improve our site and services. The California Consumer Privacy Act (CCPA) gives you the ability to opt out of the use of cookies, third-party technologies and/or the future sale of your data. Do not sell my personal information.

Support.com is committed to your privacy
Read our Privacy Policy for a clear explanation of how we collect, use, disclose and store your information
