.png)
Authored by: Support.com Tech Pro Team
If you are still having trouble, refer to the Step-By-Step Guide below, or Contact Support.Com for Personalized Assistance.

Choose a Device
A red light on the Blink Mini shows when the camera is not connected to the internet.
The red light also appears during the camera setup process. The red light should be replaced by a blinking green and a solid blue light when the connection is complete.
If a steady red light remains, use a thin object to press the reset button shown in the image (using a sharp object like pin or thumb tack can damage the camera) then wait for the red light to change to the blinking green and steady blue pattern.
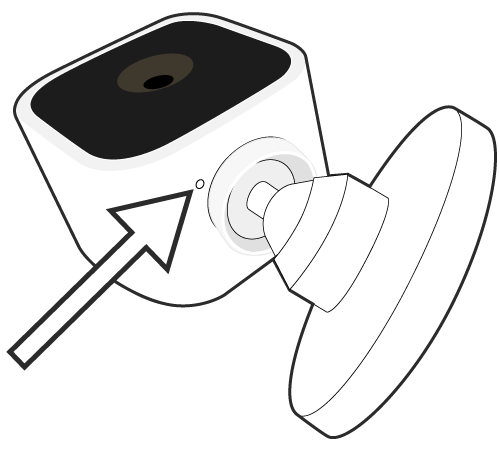
Blink Mini reset button location
If the red light does not change within 120 seconds, please contact support to ensure all updates complete correctly
The Blink Video Doorbell flashes a red LED on the indicator ring surrounding the doorbell button when it is seeking connection. During setup, and change of system or Wi-Fi, the red LED shows if the doorbell is ready to connect. If the red LED is not flashing as expected, remove one battery for five seconds and replace it. The LED should begin flashing
A red light on a battery powered camera appears when the camera is not connected to the internet. Click to troubleshoot Wi-Fi connectionsâ€.
Outdoor Camera showing LED on left, and the location of the IR emitter on the right.
When first set up, the camera's red light flashes 3-4 long blinks and then repeating short blinks after, until the internet connection is established. The red light appears when you first insert batteries. If the red light is not visible, make sure the batteries are fresh.
It is also possible to see a brief red flash during motion detection.
When the batteries are failing, the camera LED flashes Red 5 or 6 times after the Blue recording light goes out. Please make sure you have 2 fresh size AA 1.5 volt Lithium non-rechargeable batteries installed.

Outdoor & Indoor

XT2 & XT

Support.com is committed to your privacy
We do not share or sell your data to third parties. We do use cookies and other third-party technologies to improve our site and services. The California Consumer Privacy Act (CCPA) gives you the ability to opt out of the use of cookies, third-party technologies and/or the future sale of your data. Do not sell my personal information.

Support.com is committed to your privacy
Read our Privacy Policy for a clear explanation of how we collect, use, disclose and store your information
