The DJI Mavic Air has an internal memory that can store the photos you take and videos you record but it can easily run out space if you take many photos or record lots of videos. It is recommended to insert a microSD card into the drone to expand its storage capacity so that it runs out of space less frequently.
The microSD cards used in the DJI Mavic Air drone are required to have a Class 10 or UHS-1 rating.
The slot where you can insert the microSD card is located at the rear end of the drone.
4. Control Options
You can control your DJI drone using the remote control, the DJI GO 4 app, or using hand gestures when facing the drone.
Remote Control
The DJI GO 4 app on your mobile device
Gesture Controls
5. Take Photos with RC
With your mobile device connected to the remote control, use the camera view on the mobile device as a view finder.
Position the drone and aim the camera view with the control sticks.
Turn the gimbal dial below the left shoulder of remote control to tilt the camera.
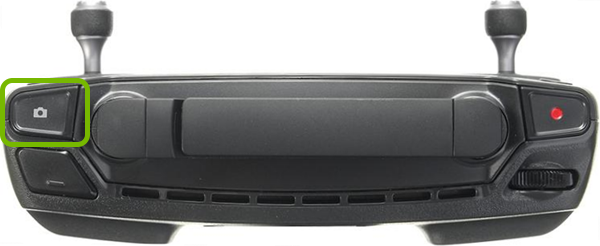
Press the shutter button on the right shoulder of the remote control to take a shot.
6. Take Photos
Launch the DJI GO 4 app on your mobile device.
Aim your camera view using the on screen controls.
Make sure the camera is set to photo shooting mode.
Tap the shutter button to take a shot.
7. Take Photos with GC
While using gesture controls, you can instruct your drone to take photos for you:
Make a peace sign with your fingers to take a selfie. Once the gesture is recognized the front lights on the drone will start flashing red for two seconds until the shot is taken.
Make two or more peace signs at the same time to take three group selfies. Once the gesture is recognized the front lights on the drone will start flashing red for two seconds before each shot is taken. After the first shot is taken, the drone will fly away and ascend from the group to take the second and third shots, then return to its original position.
Make sure you have enough space for the group selfies. The second shot will be taken from approximately 16 feet away and at a 30 degree angle, while the third shot will be taken from approximately 23 feet away and a 15 degree angle.
8. Control Options
You can control your DJI drone using the remote control, the DJI GO 4 app, or using hand gestures when facing the drone.
Remote Control
The DJI GO 4 app on your mobile device
Gesture Controls
9. Record Videos with RC
With your mobile device connected to the remote control, use the camera view on the mobile device as a view finder.
Position the drone and aim the camera view with the control sticks.
Turn the gimbal dial below the left shoulder of remote control to tilt the camera.
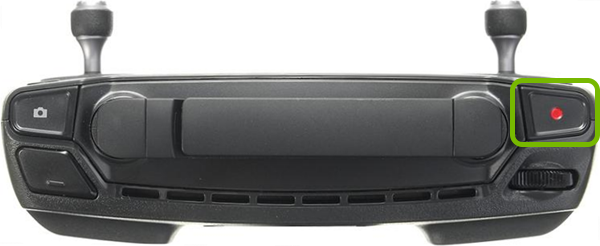
Press the record button on the left shoulder of the remote control to start recording. Press it again to stop recording.
10. Record Videos
Launch the DJI GO 4 app on your mobile device.
Aim your camera view using the on screen controls.
Make sure the camera is set to video recording mode.
Tap the record button to start recording. Tap it again to stop recording.
11. Record Videos with GC
While using gesture controls, you can instruct your drone to record videos for you.
Make a frame sign with your fingers in front of your face above your chin to start recording. Once the gesture is recognized the front lights on the drone will turn off and the camera will start recording. After five or more seconds have elapsed, making the frame sign again will stop the recording.
.png)